a light in the void
Timeline
Summer Session 1
Week 1 (7/1):
-
Project Ideation
Week 2 (7/8 Proposal due):
-
further fleshing out concept/game idea and details
Week 3 (7/15 Timeline due):
-
Create pixel art assets on Resprite (characters, background, UI, Title screen, PR image)
Week 4 (7/22 Inspiration paper due):
-
Godot: make a working prototype of movable character in a map
Week 5 (7/29 Current progress Presentation + Website due):
-
Godot tutorials and work on designing mini-games
Summer Session 2
Week 1 (8/5 Updated proposal due):
-
Godot: dialogue, main menu
Week 2 (8/12 Exhibition List due):
-
Godot: scene transitions, interactables
Week 3 (8/19 Updated Website and PR image due):
-
NPC animations/interactions, put everything together
Week 4 (8/26 Curatorial Meetings/Poster/Announcement):
-
Implement audio, either my own using free tools online or sourced free sounds
-
Upload final game to itch.io
-
Record a demo
Week 5 (8/30-31 Final Project due):
-
Last minute touches
- Plan to exhibit in B-114 on Desktop Computer
- back up: use personal laptop
Assets and Artwork
I used Resprite and Aseprite to create all of the artwork for this project.
For the shadow sprite in particular, I struggled to make the silhouette readable for animations, so I used the help of a free-to-use/edit animated base sprite.
I found that dimensions, resolution, and scaling were important factors to decide early on while working with pixel artwork as non-integer scaling methods can result in deformed and non-uniform pixels.
Pixel dimensions:
-
Main character = 17x24 px
-
Shadow = 16x16 px
-
Asset Grid = 16x16 px
-
Viewport Resolution: 320x180 px (16:9 aspect ratio)
Godot (Version 4.2/4.3)
Godot uses its own programming language called GDScript, which is similar to Python. The official Godot documentation, YouTube tutorials, reading forums, and any prior knowledge from my Intro to Python course were essential to helping me learn Godot. Despite 4.2 and 4.3 being released very recently (just before and during the span of working on this project), I found that there were already a variety of resources available from the community.
YouTube Tutorials:
DevWorms
Nathan Hoad
Chris' Tutorials
Quebely
Player Movement
I followed a Devworms tutorial to add Player idle and walking animations using AnimatedSprite2D. I also added to it further with the help of forums to make directional idle animations work as well. Player movement is controlled by WASD, which is set in the project setting's input map.
Dialogue Manager by Nathan Hoad
Despite being an add-on to make this project less burdensome, I still had to spend plenty of time understanding how to use all of its functions. Using Nathan Hoad's documentation and tutorials, I added dialogue voices, an animated dialogue indicator, branching dialogue options, and calling animations or variables within the dialogue to manage interactions and make cutscenes.
Tilemap Layers
Tilemaps were deprecated for tilemap layers in the new 4.3 update, which caused a moment of confusion but was relatively easy to transition to. I have painted the Physics layer on the tilemaps in order to make objects have collision.
Interactions
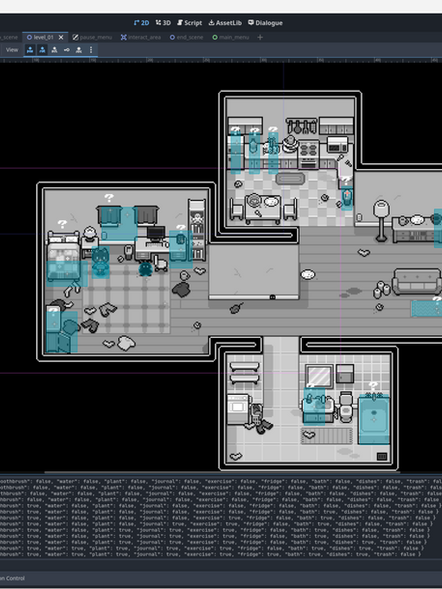
I went through several interaction tutorials to get to understanding how it works. The common method was using Area2D with a CollisionShape2D to detect overlapping collisions with the player. I set global variables and a dictionary holding all of my unique interactions with a value of true or false depending on whether they've been interacted with. Some interactions trigger scene transitions and animation changes, while others are more reliant on dialogue. I had to combine these methods with the Dialogue Manager add-on to create cohesive interactions.
NPC Follower
After struggling to implement a clean way for an NPC to follow the character, I happened upon this small tutorial by a Reddit user: This code allows me to simply drop a Node2D, such as my player character sprite, into the Shadow NPC's "objective" variable, which can be further adjusted with offset and following distance.
User Interface
UI elements included the main menu screen, credits screen, pause screen, and dialogue balloon. These utilize nodes such as CanvasLayer, MarginContainer, VBox Container, Buttons, and Labels as ways of formatting elements on a screen.


